Showing posts with label sewing. Show all posts

Saturday, April 2, 2016

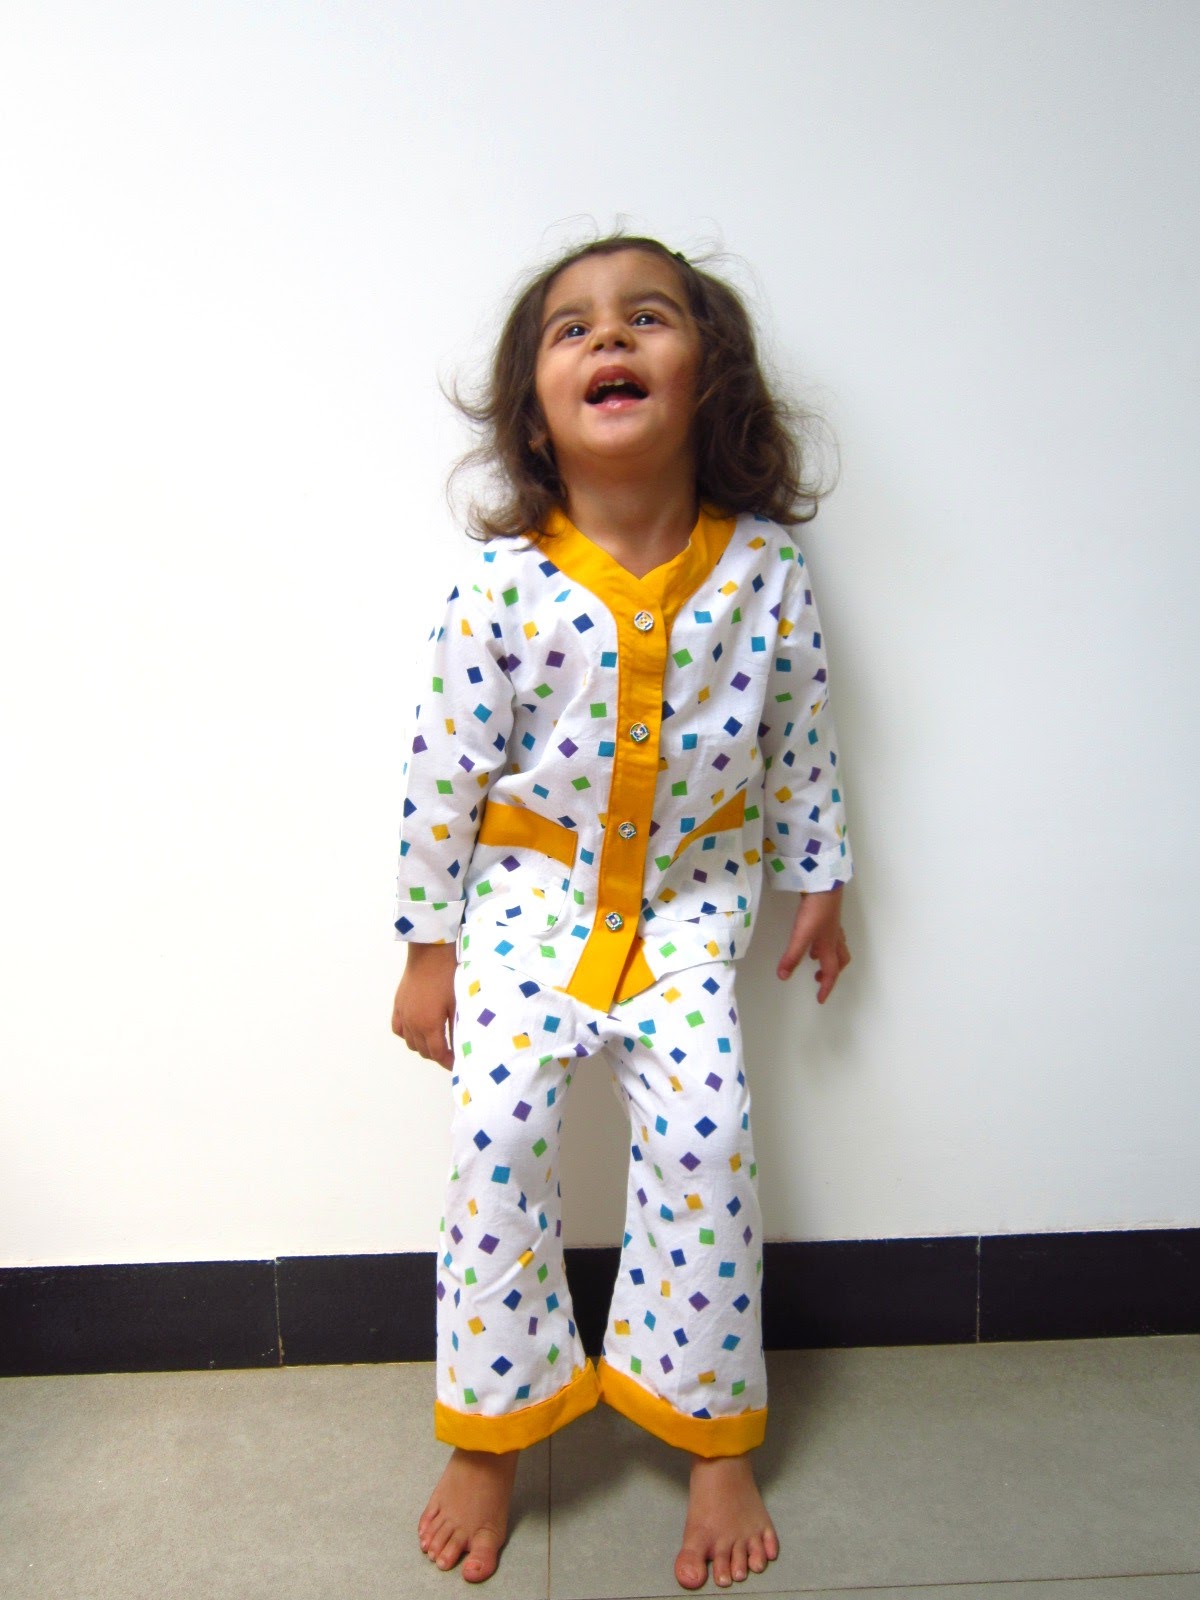
Sleepover Pajamas

Let me tell you what I have been doing - I have sewn a bunch of clothes, read a few books, thrown a few parties, tried a few new recipes (infact I am devouring some home-made chocolate mint icecream as I write this post!).... Let me tell you what I have not been doing - blogging!

Apologies are in order. Let me start by posting about the sleepover pajamas. I sewed these up last December.


I finished these pretty quickly. As usual nothing can go wrong with Oliver+S!

Where I got stuck with this project was the button holes! It's just that I am such a sloth! So I stashed this new piece away for a later time. Come February, I realized that I had still not done the button holes on this one, so finally the auspicious moment arrived and I finally finished the button holes!

Wait, its not done yet. I stashed this piece away again. I still had to sew on the buttons!! So here I am at the beginning of April, finally putting on the buttons!

I asked Adrika to give it a try. Lo and behold, she's grown bigger from last December, so now I need to unfold all the cuffs to make this fit! Thankfully there are cuffs on this pattern and I can do this easily and make it work!

So if you feel the sleeves are a bit short, they are! I will open them up soon, promise ;)


Enjoy!


Tuesday, November 17, 2015

Asymmetric Neck Top

There is always a first time for everything. This is one of those firsts. First time sewing for myself.

We all have a piece of garment we love. It fits great, looks great. I had a green cotton top with a diagonal neckline that looked great. Unfortunately it got worn to death! So I thought about cloning it!

I wish I had a better "before" picture to show you.


This is also the first time I drafted a pattern for myself from an existing piece. I will try to add some photos of how I went about doing this.

First I took the top apart at all the seams. There were only 4 basic elements - sleeves, front piece, back piece, small decorative tie. It looked really simple to put together. 

Part A : Drafting the pattern

1.  For the sleeves, I opened up one of the sleeves completely and traced it out on a tracing sheet.

Here are my drafted sleeves -


Most of the seam allowances were 1/2 inch already, so the drafting was easy.

2. Next the front and back pieces -


The front and back piece were essentially the same, except for the asymmetric neckline on the front piece.


So I made a single pattern piece using the back piece for both.


Also I made some adjustments to the seam allowances where needed. Like here I added another 1/4 inch to the seam allowance at the arm hole to get a 1/2 inch seam allowance. I feel that 1/2 inch seam allowance gives me more room to finish the seams well.


Since the front and back were same sized, I didn’t want to re-trace the pattern. So I decided to just have a asymmetric neckline cut-out. Something like a 1's complement (pardon my geekiness! I can't think of a more apt way to describe this!)  piece that I can cut out to get the desired front piece.


Note that this piece is smaller by 1/4 inch to allow for the desired seam allowance at the neckline.

3. Decorative tie - There was no pattern piece required here.


Part B: Construction

1. Decorative tie -
I just measured the length and cut out a strip to 14 inches long and 1 inch wide on the bias. Then went about folding it in half with right sides together and sewing a 1/2 inch seam along the length to create a tube. Next trimmed the seam allowance to 1/4 inch. Using a loop turner I turned it out the right side. Then added the tiny bells to the ends of the tie by hand.


2. Sleeve construction -
Cut out two of the sleeve pattern pieces from the fabric. Started off by finishing the hem on the sleeve. I folded the raw edge under by 1/4 inch and again by 1/4 inch to create a narrow hem. Attached a piping to the edge.


3. Attach the front and back pieces at the shoulder seam. I used french seams for this. Also I stay stitched the front and back necklines.


4. Next attach the sleeves to the arm holes of the top. There are many tutorials online to help with this. Since its a curved seam, take time to gently gather while attaching the sleeve. Also to finish the armscye seam, I flat-felled them. They turned out quite neat.


Nearly there!


5. Side seams - This top has side slits, so I used this and this tutorial to sew the side seams.

6. Neck facing - This tutorial was excellent to understand how to do a neck facing using bias tape. Originally I had planned to do this and then attach the piping to finish the garment. However I came across this article and realised I could save a little time and effort by using the piping itself for the facing!

7. Last step attach the decorative tie to the neckline by hand.

All done!


 Enjoy!

Wednesday, September 2, 2015

Popover Sundress

The popover sundress is a free pattern from Oliver+S. Darn cute!

I made two exactly same dresses. One is for my model and the other one is for Diya for her beach holiday! It's a simple yet timeless dress.

Also this is the first time I used a modern colour combination. Something which I wouldn’t pair together normally. Navy blue and yellow just go together.


Enjoy!

Thursday, August 20, 2015

Ice Cream Top

The sewing blog world is teeming with adulation for the liberty fabric prints. And rightly so, they are delightful! Sadly, I do not know of any place in India selling liberty fabric per se. So when I came across a very 'liberty' like fabric at my local fabric store, I was enticed into parting with the hard-earned!

Here is another take on the icecream dress pattern. This is a tunic version.


The fit is cute, isn’t it!

Enjoy!

Thursday, July 30, 2015

Red Day

Little doll has recently started pre-school. It's a darling place, they play and paint and get messy a lot! Recently in a bid to teach all about colours to these little one's they celebrated a red day. Everyone had to wear a red dress and get something red for a snack, ergo I sewed her a red dress and baked a beetroot red velvet cake!

A few months ago I got really tempted and bought the Oliver+S Ice cream Dress pattern because of a darling version I saw on the flickr group. 

Here is my rendition -


And here is my model -


My doll with her doll - Heidi

Kisses to Heidi!


Ma, do you want a side profile pose!?


I have had enough! Meltdown!


Thanks to nani for the beautiful red chikan eyelet fabric!

Enjoy!


Thursday, July 16, 2015

Sunny Day Shorts

Alright alright I have been slacking off quite a bit! In the whirlwind of events happening everyday I have been pushing updating the blog on the back burner for a while.
I made two pairs of the sunny day shorts from Oliver+S for this summer. They have been worn to death! As always the pattern was a breeze to sew up. It was really easy with great instructions.


I have shortened the hem by an additional inch and used french seams on the sides. The crotch seam has been bound.


Here is the other pair in red gingham. I have added ruffles to the hem.


Enjoy!

Friday, May 22, 2015

Jump Rope Dress View B

I made this dress a while back. Only finding the time now to blog about it.
We moved into our new house a month back and still have a lot of things happening around. (A post on the house coming up soon!)


This is the View B of the Jump Rope Dress by Oliver+S.


I made this one for my niece - Naisha. In fact she got it just now and its already a bit snug for her! (facepalm!)
Moral - Make the clothes a size bigger if they are not reaching the recipient immediately!
The fabric is raw silk in hot pink with a black ric-rac trim accents.
Some close up of details below -


Sorry about the last one, the pocket was a bit unpressed!
This was a fun project, the sides were finished with all french seams and the armscye seam was a bound one. The fabric was tedious to work with, it frayed so bad! I had to work quickly to keep things in order!

Enjoy! And I am back!