Saturday, December 27, 2014

Candied Ginger Cookies

My vegetable lady brought this beautiful young ginger that had our name written all over it. Originally we set out to make ginger syrup for making ginger ale, however I left them to cook a wee bit longer and it turned into candied ginger. No problem, it can be put to good use. If you want a good recipe for candied ginger then try this one by David Lebovitz.
This recipe yields 4 dozen cookies. 


Ingredients -

1 cup unsalted butter (room temp)
1/2 cup sugar
3/4 cup chopped candied ginger
1/2 tspn dry ginger powder
1/4 tspn salt
2 cups flour

Procedure -

Cream the butter and sugar till pale and creamy. Add candied ginger, ginger powder, salt. Mix well. Add the flour gradually incorporating it completely. This will form a soft cookie dough. Put this dough between two sheets of parchment paper. Roll it out to 1/4 inch thickness. Refrigerate for at least 1 hour.
Preheat oven to 170 C and prepare cookie sheets. Cut out the cookies and bake for 18 mins or till edges are golden. If dough is remaining then roll it out again and refrigerate for next batch. Cool the cookies on the baking sheet for 5 mins before transferring to a wire rack. 
Decorate with melted chocolate and let it cool to harden.

Enjoy!


Friday, December 26, 2014

Onstage Tutu Skirt

Did I tell you I love Oliver+S !? It's my favourite sewing pattern website. Now you know where to get me gift cards from (wink wink!).
This skirt pattern came out for this holiday season. It's adorable and even for a beginner like me, this was really really quick and easy. They even have a sew along blog - day1 and day2. The instructions are super easy and so neat. The finish is awesomely professional. Did I mention I love them! :)

I decided to make one for my toddler in black. Well, I am not really sure we get tulle in India, so I actually used a net fabric. I am going to try another one of these skirts using organza in a very Indian print.

Also I have intentionally made this a little longer so that it fits my doll for at least a year more.


I faced real difficulty to get her to pose this time around! I hope with the next skirt she is more cooperative!

Enjoy!

Friday, December 12, 2014

Dark Chocolate Orange Cookies

I wish you could taste these! I wish you could smell these! I wish you could smell my house when these were baking! Little drops of heaven!
These are by far the best flavour of cookies I have tried baking yet.

The recipe is from this blog. Turned out to be beautiful crisp biscuits with oodles of orange flavour. Last time around I had made 2 dozens and fell short ;) so this time I made 6 dozens! Yes, you read that right - 72 cookies!


Ingredients -

2 cups whole wheat flour
2/3 cup dark cocoa powder
1/2 tspn salt
1/2 cup + 2 tbspn sugar
zest of 2 small oranges
1 cup unsalted butter at room temperature
1 tspn vanilla extract
juice of 1/2 small orange

Procedure -

Mix flour, cocoa powder and salt and keep these dry ingredients aside.
Zest the oranges and mix well with sugar. Incorporate the zest well, this would release the orange essential oil into the sugar and results in a beautiful orange sugar (by itself this can be used on top of desserts and other goodies).
Add butter and whisk well till pale and fluffy. Work hard here! Ensure the mix is really smooth. Add vanilla extract and mix the orange juice.
Add the dry ingredients in two batches, each time slowly incorporating it thoroughly. This mixture would now form a soft cookie dough.
Shape the dough into a rectangle between two parchment sheets or wax paper. Flatten with a rolling pin to 1/4 inch thickness.
Place the dough in a refrigerator for at least 1 hour.
Preheat oven to 170C. Line the baking trays. Cut the rolled out dough into cookies using cutters and bake for 18 to 20 mins or till edges are crisp. Remove from the oven and let it cool on the baking tray for 5 mins. Move to a wire rack to cool completely.


Adrika pondering on deep questions whilst devouring cookies. My dainty princess(read - really fussy eater) immediately ate 5 of these out of the oven!

Enjoy!

Monday, December 1, 2014

Cranberry Orange Cookies

After making the cranberry lemon muffins, I really wanted to try the combination with oranges. Here is an attempt at cranberry orange cookies based on the same recipe as described in http://tworedbowls.com/2013/12/15/cranberry-orange-shortbread-cookies/.

These turned out so darn scrumptious that we managed to finish the full batch of two dozen cookies in one night! Yes, we ate all the 24 cookies in one go! I have been asked to lay off baking for a while, else our weights are heading north steadily!


Ingredients -
1/2 cup unsalted butter at room temp
1/4 cup + 2 tbspn sugar
1 tspn vanilla extract
1/4 tspn almond extract
1/2 tbspn freshly zested orange
1/4 cup dried cranberries
1 cup flour
1/8 tspn baking powder
pinch of salt

Procedure -

Cream the butter and sugar till pale and smooth. Add the vanilla extract, almond extract and orange zest. Beat well. Add the cranberries and incorporate. Add the flour, baking powder and salt. Mix till a dough starts to form.
Shape this dough into a long log of about 1.5 inches diameter, wrap and refrigerate for at least 1 hour.
Preheat the oven to 180C. Cut the cookie dough log into discs of 1/4 inch thickness. Space these biscuits on the cookie sheet about 1 inches apart. These will not spread much. Bake till pale golden for 12 mins. Cool on the baking tray for 5 mins and remove to wire rack for further cooling.

Enjoy!

Tuesday, November 25, 2014

Cranberry Lemon Muffins

The inspiration for these muffins is from http://sallysbakingaddiction.com/2014/11/06/cranberry-orange-muffins/. This is one of my favourite sites for baking stuff.
Also, I didn’t have any oranges. So I decided to experiment with lemons. These are organic lemons from my mother-in-law's lemon tree!

Here is my version of cranberry lemon muffins with a lemon glaze -


This recipe makes 6 muffins.

Ingredients -

1/4 cup unsalted butter at room temp
1/4 cup sugar
1/8 cup brown sugar
1 egg at room temp
1/4 cup yogurt
1 tspn vanilla extract
Zest of 2 lemons
1 cup wheat flour
1/2 tspn baking soda
1/2 tspn baking powder
1/4 tspn salt
1/4 tspn cinnamon powder
1 tbspn lemon juice
1 tbspn milk
3/4 cup dried cranberries

For Lemon Glaze -
3/4 cup finely powdered sugar
1 tablespoon lemon juice

Procedure -

Preheat oven to 220C.
Beat the butter till soft and creamy. Add the sugars and whisk well. Add egg, yogurt and vanilla extract and whisk well. The yogurt gives these muffins a really moist quality. Add the lemon zest and incorporate well.
Mix all the dry ingredients and add them to the wet stuff. Mix well. Add the lemon juice and milk. Add the cranberries and fold them in the batter.
Bake in the oven for 5 mins at 220C. Without taking the cupcakes out, lower the temperature of the oven to 180C and bake further for 20 mins or so. Check to see if done with a clean toothpick test.
While the muffins cool, whisk all the glaze ingredients and pour over the glaze on the warm muffins. Allow to cool before eating.

Happy seventh anniversary honey!

Enjoy!

Saturday, November 22, 2014

Chappati Cozy

Ajay takes a lunch box to college. It is healthier and tastes better than the food at their canteen. So chappati is a regular feature in the lunch box and I have been thinking of ways to ensure that it stays kind of warm and soft. Yes, yes,  I know I can just use foil or something, but that just seems so wasteful. In our efforts to be an environmentally conscious family we ditch anything that cant be reused. We don't even own aluminium foil!

So here is the tortilla warmer aka. chappati warmer that fits the bill!


This project used up some of my previous project scraps so I get bonus points!

What is it ?? There are two round pieces of quilted and batted fabric(8 inch diameter) with an inner muslin lining. These are then pieced together at the halfway mark to make a half open envelope using a similar coloured binding.
The original tutorial is here - http://leafytreetopspot.blogspot.in/2010/07/tortilla-cozy-tutorial.html
This can be used straight away in a microwave and washed for reuse!
Reuse - Reduce - Recycle!


He likes it and says its really professionally done and that I could sell these! Made my day. :)

Enjoy.

Monday, November 17, 2014

Cross-Stitch Family Portrait

This is the day and age of obsessive "selfies". They are everywhere. The social network is teeming with them. And here I am in my own anachronistic world peering at those tiny square of an Aida fabric trying to embroider a cross-stitch family portrait. It took more effort than I thought. So here is the end result.


The last time I attempted a cross-stitch was in the 5th grade! This time around I wanted to do stuff much more professionally and extremely neatly.

The inspiration for this project came of this place -
http://www.marthastewart.com/857131/cross-stitch-family-portrait

Now counting cross-stitch is not as easy as it looks. There is the whole matter of getting everything properly accurate once you start embroidering. Also I wanted to make slightly bigger figures so I had to put in some math to scale up my picture.

Here is the original plan all put on a graph paper -


Once I had a general idea of the portrait, I spent a fair amount of time learning all about colour blocking. I wanted to use colours that go well together yet look really vibrant and coordinated. After spending quite a few hours, I kind of decided on the colour scheme and started shopping.

The major stumbling block was acquiring the right Aida fabric. I wanted a count 14 or higher. Finally found it on the pony craft store - http://www.ponycraftstore.com/product/viewdetail/aida-fabric-white-42-x-48cm-70402

Also more hours watching videos and learning to cross-stitch properly, I think I managed to do a decent job with this piece. Look at the back side of my embroidery to get a gauge of the quality. There is not a single knot anywhere. All the crosses cross over the same way and I have all these beautiful parallel lines on the back. So I finally did something right! And what a lesson in patience!


Now all that is left is to carefully wash this up, add some interfacing to stiffen the backside and frame it up. This one goes up on my craft station at the new house!

Enjoy.

Thursday, September 18, 2014

Mini Caramel Apple Pie

When one gets apples, make apple pie!
I know that one was cheesy :). Apple seems to be Adrika's very first word( or so I think!). So here is something to commemorate that.


This recipe makes about 4 muffin cup sized pies.

Pie Crust

1 and 1/4 cup flour
1/2 tbspn sugar
1/8 tspn salt
1/2 cup oil
4-6 tbspn milk

Mix everything in a bowl till moist clumps form. Keep adding milk to help clumping. Once they just about start coming together, the crust dough is done. Press to the muffin cups by hand . Try to keep the bottom slightly thicker so that fluids don't leak.

Filling

1 Apple cubed small with peel (healthier!)
2 tspn sugar
1/2 tspn lemon zest
Juice of 1/2 lemon
1 tspn cinnamon powder
1/4 tspn nutmeg powder
pinch of salt

Mix everything together.

Salted Caramel

1 cup sugar
3 tbspn cream
1/2 tspn salt

Add the sugar to a deep bottom pan and set on low-medium heat. Just swirl it around, never use a spoon or spatula to stir. Be patient, it takes some time for the sugar to liquidize. After it melts and turns a deep orange/red, switch off the flame. Add the cream and salt, be careful this will splutter and the whole thing is super hot. Mix in the cream well, till caramel sauce is formed. Allow it to cool completely. NEVER EVER EAT HOT CARAMEL EVER!

Putting it together

Preheat oven to 180C. Fill the pie crust with layers of apple filling and caramel sauce. Bake for about 25-30 mins or till the top edges are browned.
Let it cool completely for about 40 or 45 mins before eating.

 Enjoy!


Sunday, August 17, 2014

Ravioli

We love Italian cuisine (including the tiny tot who loves pasta!).
This ravioli is made from scratch. Even the pasta dough was homemade and is eggless. It is a tedious procedure but turns out really nice.

Spinach and Cheese Ravioli in Creamy Tomato Sauce

Fresh Pasta Dough 
Makes 27-28 raviolis

1 cup whole wheat flour
1 cup semolina
Pinch of salt
1 tbspn olive oil
3/4 to 1 cup warm water

Mix the flours and salt. Drizzle in the olive oil and work the dough into bread crumb consistency. Add water little by little so that it keeps resembling bread crumbs. Slowly they will start clumping together. It will form a nice dough. Ensure it is not too soft. If required add more semolina. Set aside covered with a damp cloth for 30 mins.

Spinach and Cheese Filling

1 tbspn olive oil
1 big bunch of spinach leaves
1 cup of mixed cheese (Ricotta, Mozzarella, Parmesan)
Salt and pepper to taste

Heat olive oil in a pan, add the spinach. Cover and cook the spinach to wilt it. Once wilted, open and cook to evaporate any liquid.
Once cooled, chop the spinach and move to a bowl. Mix in the cheeses and season with salt and freshly cracked pepper.

Assembly of Ravioli

Roll out the dough on a well floured surface to as thin as you can. Paper thin is preferable (1/3 cm thickness). The thinner the pasta sheet the better the cooked ravioli would taste. However if it is too thin, then it would burst open while boiling. This is one of those hit and try method of figuring out the right thickness. But think paper.
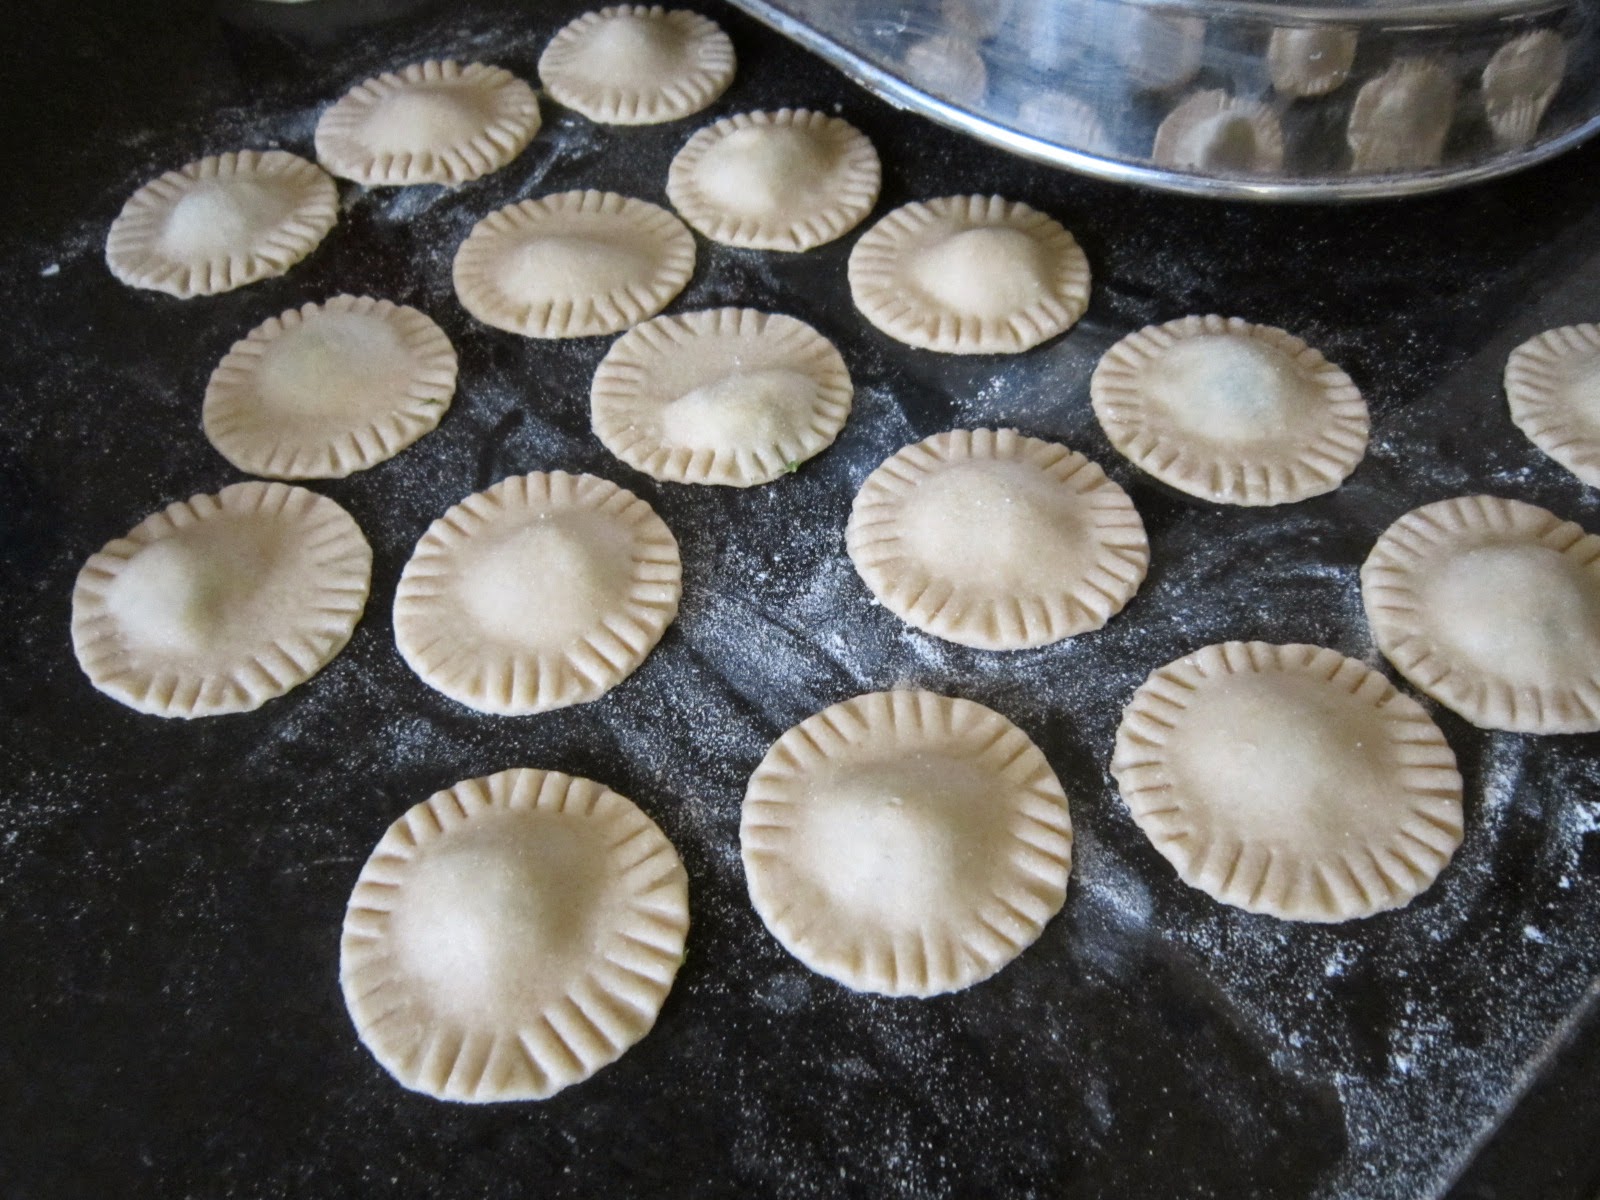
Try to roll out the dough into a rectangle.We need to finally fold the sheet into half length wise. Next place teaspoon worth filling into one half of the sheet at equidistant spaces and cover over the other half to enclose this filling. Remove any air bubbles. I use a cookie cutter to cut them out into circles and crimp the edges with a fork.


Once made, let them dry out on a floured surface for 20 to 30 mins.


Creamy Tomato Sauce

1 tbspn olive oil
1/2 medium onion finely chopped
4-5 pods garlic finely chopped
3-4 medium de-skinned tomatoes chopped finely
1/2 cup tomato puree
Salt and pepper to taste
Red chilli flakes
Oregano
1 cup cream
Grated parmesan cheese

Heat olive oil in a pan, add the chopped garlic and onion. Cook till onions are translucent. Add the tomatoes and puree. Cover and cook for 10 mins. Add the salt, pepper and other spices. Once cooked well, add the cream and grated cheese. This sauce really tastes divine!

Final Assembly

For final cooking, bring a large pot of salted water to a rolling boil. Put in the raviolis and let it boil for 2-3 mins. They will start to float when done. Remove and add sauce on top. Garnish with more cheese and basil.


Enjoy!

Saturday, August 16, 2014

Coorgi Delights

Coorg is my absolutely favourite vacation destination. I am a jungle/mountain kind of person and this spot literally hits the spot!
Its green and untouched. Its full of coffee estates and people living lives I wish I was living! In a farm house tucked far away in a remote corner of the planet. Coorgi people are very warm and have a very rich culture. They are a warrior race (a lot of them still serve in the armed forces) and are proud of their unique heritage. Their food is divine. Here are a couple of recipes I learnt in 2009 during our maiden trip to Madikeri.

The beautiful winding roads

Paputtu

This is a breakfast idli type bread. Its slightly sweet and sumptuous.


Ingredients -
Idli rava - 1 cup
Water - 1 cup
Milk - 1 cup
Sugar - 1 tablespoon
Salt to taste
Grated Coconut - 3/4 cup
Cardamom seeds - 2-3 pods

Procedure -
If you don't have the pre-made idli rava, one can process 1 cup dry rice in a mixer to get the rava (think phirni type rice).
Wash idli rava, soak in 1 cup water for 1/2 hour. Mix the milk, coconut, sugar, salt and powdered cardamom seeds.
Pour the batter in an oiled thali or flat bottom plate with sides. Paputtu is shaped like a pie. Steam for 25 to 30 mins.

Kooru Curry

I am calling this kooru curry, but kooru is rajma. I am using lobhiya here. One can also use butter beans.


Ingredients -
Lobhiya - 2 cups soaked overnight and pressure cooked for about 20-25 mins
Onion - 1 medium finely chopped

For seasoning -
Oil - 1 tspn (We use a non stick hence the less oil, increase if required)
Rai - 1 tspn
Urad dal - 1 tspn
Curry leaves - 4-5

For paste -
Coriander seeds - 2 tspn
Coconut - 1/2 cup grated
Dry red chillies - 3-4
Garlic pods - 3-4
Black pepper - 1 tspn
Jeera - 1/2 tspn

Turmeric powder
Tamarind to taste
Jaggery to taste
Salt to taste

Procedure -


Heat oil in a pan, add rai, urad dal, curry leaves and chopped onion. Fry till onions are translucent. Add cooked beans, salt and turmeric powder.
Grind the ingredients mentioned under paste. Add this paste to the cooking pan. Add water to make a gravy. Boil till ground paste is cooked. Balance out with a bit of tamarind and jaggery to taste.


This is a popular meal in the household. Ajay loves the curry, Adrika loves the paputtu!

Coorg is indeed the Scotland of India. Its a breath-taking place where one can see a million fireflies dance about at night. It is one of those hidden gems. Here is to many more holidays in paradise.


Saturday, August 9, 2014

Funfetti Cupcakes

Saturday mornings are leisurely. It's a half day for Ajay's college so there is no rush of packing up his lunch. This Saturday morning we enjoyed a bit of sunshine after days and days of rain. It's a glorious day! Time to celebrate with some dessert for breakfast!


Ingredients:-
Makes 6 large cupcakes

1/2 cup unsalted butter
3/4 cup sugar
1 tspn vanilla extract
1 egg
1 1/2 cup whole wheat flour
1/2 tspn baking powder
1/2 tspn baking soda
1/2 tspn salt
3/4 cup milk
confetti sprinkles

Procedure:-

Cream the butter and sugar till light and pale. I used a hand whisk (easier to clean!). Add the vanilla extract and the egg. Beat well till fluffy and light.
Add all the dry ingredients. Mix it in with the milk into a smooth batter. Add the sprinkles at the very end and do not stir too much for they start losing colour.
Bake in a 170C preheated oven for 30 minutes or till a toothpick comes out clean.


Wednesday, June 18, 2014

Chocolate Tart

This is by far the most decadent dessert I have ever prepared, indulge with caution!
Football fever has gripped the family. This was prepared for the opening night gala.


Ingredients:-

For the pie shell -
90gms unsalted butter cut into cubes
1 tbspn veg oil
3 tbspn water
1 tbspn sugar
1/8 tspn salt
150 gm or 1 1/4 cup whole wheat flour

For the filling -
300ml cream
2 tspn sugar
pinch of salt
250gm dark chocolate
50ml milk

Procedure -

The pie tart shell recipe is by my favorite dessert chef David Lebovitz. Here is the complete procedure -
http://www.davidlebovitz.com/2009/05/french-tart-dough-a-la-francaise/
Quick summary - In an oven proof bowl combine butter, oil, water, sugar and salt. Place bowl in oven for 10-15 mins till butter is bubbling and starts browning at the edges. Remove from oven and dump in the flour. Stir quickly until it all comes together. Transfer to a 9 inch pie shell and spread it evenly with fingers. Reserve small amount of dough for patchwork later. Take a fork and crimp sides and prick shell. Bake for 15 mins. Cover and patch cracks and bake for 5 more mins till golden brown. Let is cool completely before putting in any filling.

Filling was inspired by Jamie Oliver's chocolate tart filling.
For the filling, boil the cream, sugar, salt on simmer. Switch off and add chocolate pieces. Let is melt on its own, do not over stir or the cream would churn into butter. Add some milk to adjust consistency(want a soft serve type consistency). Fill into the baked cooled shell and refrigerate for 3 hours till set.

Here is our most ardent football fan -


Enjoy!

Bets in the house -
Me - Argentina
Ajay - Germany
Adrika - Don't understand what the fuss is about


Cranberry Oatmeal Cookies

Another visiting aunt and another gift bag! This time around using up the lip smacking dried cranberries.


Ingredients:-
1/2 cup unsalted butter
1/2 cup packed brown sugar
1/4 cup white sugar
1 egg
3/4 cup whole wheat flour
1 1/2 cups instant oats
1/4 tspn baking powder
1/4 tspn salt
1/4 tspn nutmeg powder
3/4 cup dried cranberries

Procedure:-
Preheat oven to 165C. Cream the butter, sugars. Add in the egg and beat till light and fluffy.
Add flour, salt, baking powder, nutmeg. Add in oats and cranberries.
Bake for 20 mins or till golden brown.

Enjoy!